
JPSS studies the Earth's processes that cause the weather; temperature, air pressure, humidity, clouds and wind. In this activity you'll learn about wind and weather while crafting your own windsock!
NOAA’s Joint Polar Satellite System (JPSS) provides data and imagery to scientists, businesses, planners, and government agencies so that they can make maps with helpful information.
Anytime you open your smartphone and check your weather forecast, you’re benefiting from JPSS data. In order to predict the weather, we need to observe the weather — all over the world. A dust storm in Africa, for example, can affect the development of a hurricane that hits the East Coast. A typhoon in Japan can cause heavy rain in California several days later.
JPSS satellites observe every place on Earth at least twice a day, as the satellite orbits the globe from the North Pole to the South Pole 14 times daily. This means that as the Earth rotates underneath the satellite it will pass over every single spot on Earth at least twice every day.
JPSS satellites carry instruments that help us learn about the weather. The Visible Infrared Radiometer Suite (VIIRS) is like the eyes of the satellite. It measures in the infrared and visible part of the spectrum and gives us images of hurricanes, floods, dust storms, cloud patterns, and ocean color. It also helps locate and map wildfires and track wildfire smoke. The Advanced Technology Microwave Sounder (ATMS) is like an X-ray. It can see through the clouds and inside the storms. ATMS and the Cross-track Infrared Sounder (CrIS) instrument, give weather forecasters a global 3D picture of our atmosphere’s temperature and moisture—the most important information needed by forecast models.
The Ozone Mapping and Profiler Suite (OMPS) tracks the concentration of ozone in the atmosphere. This is important because the ozone layer protects against harmful ultraviolet rays from the Sun. Data from OMPS are used in ultraviolet index forecasts, which keep the public informed about the harms of UV damage. OMPS also provides valuable measurements of stratospheric aerosols, such as those caused by volcanic eruptions and wildfires.
JPSS satellites orbit at an altitude of 512 miles (824 km) above the Earth’s surface. This distance allows it to make detailed observations of our land, atmosphere, and oceans.
The five main factors affecting weather are:
- temperature
- air pressure
- humidity
- clouds
- wind
Global weather is also affected by landforms, ocean currents, and the proximity to large bodies of water. All the systems on Earth are connected and our global weather is a result of many Earth processes working together.
Wind is the natural motion of air. Wind can be created by changes in air temperature and pressure. Like water, hot air, and cool air do not mix and this creates convection. When cool air from the ocean meets sun warmed land masses the air becomes warm and rises. Once the air is higher in the atmosphere it cools, becomes more dense, and sinks again. This creates the natural cycle of convection that creates wind.
A windsock is a fun tool that you can make to learn more about the weather. Windsocks help us measure the wind’s speed and direction. This can be helpful information for weather prediction, aviation, fire management and even monitoring gas leaks.
Wind forecasting is even important for sports. For example, outdoor football stadiums all utilize windsocks to indicate the strength and direction of winds. They also place ribbons on the top of goal posts to indicate the same information for kickers. Wind plays a major factor in how teams play. When sustained winds are about 15 - 20 mph, they can have a drastic effect on how the ball travels through the air, often causing teams to use short, conservative passes instead of long throws down the field. Winds also affect kicking. High winds that sometimes swirl through stadiums can cause balls to come back towards the kicker or punter like a boomerang. Kickers will change their angle and approach according to the wind. Teams in windier climates, like teams near the Great Lakes, prepare for such conditions and can even use them as an advantage against teams not used to playing in that kind of weather.
Windsocks demonstrate the direction the wind is traveling. The direction of the wind is the opposite in which the windsock is pointing. If your windsock is pointing to the west that means the wind is blowing in an easterly direction.
Meteorological windsocks are made from orange and white striped fabric that is sewn together. These stripes give information about the power of the wind. When you are looking at a windsock each stripe flying parallel to the ground adds three knots of wind speed.
| 1 stripe | 3 knots | (3.5 mph / 5.6 km/h) |
| 2 stripes | 6 knots | (6.9 mph / 11.1 km/h) |
| 3 stripes | 9 knots | (10.4 mph / 16.7 km/h) |
| 4 stripes | 12 knots | (13.8 mph / 22.2 km/h) |
| 5 stripes | 15 knots and higher | (over 17.3 mph / 27.8 km/h) |
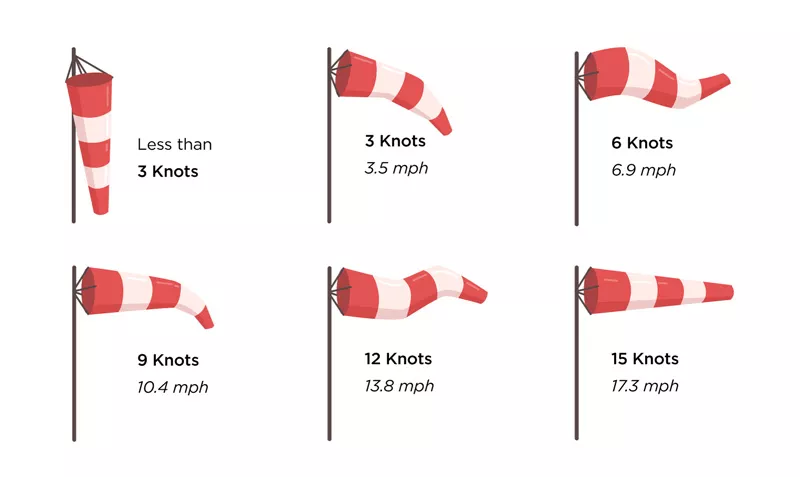
The stripes on these meteorological windsocks give information about the power of the wind. When you are looking at a windsock each stripe flying parallel to the ground adds three knots of wind speed.
Materials
- Wide tape such as duct tape or packing tape.
- Ribbon
- Thick paper, fabric or the JP Super Seal windsock on the last page of this template
- Clear tape or craft glue
- String
- Hole punch
Instructions
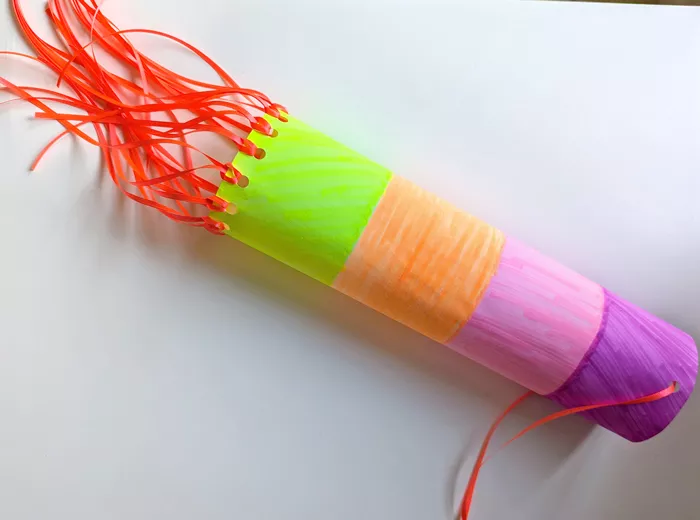
- Decorate a rectangular sheet of paper or fabric with the designs you’d like on your windsock or color your JP the Super Seal template.
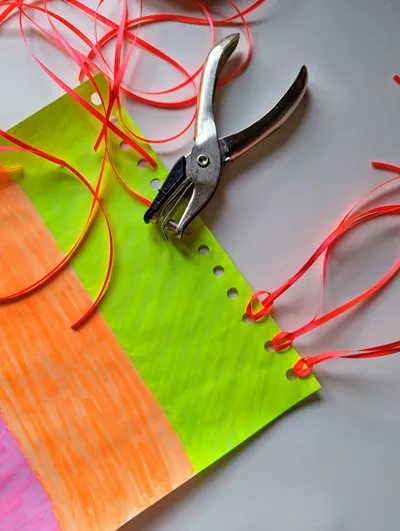
- Punch holes along the bottom of the windsock and tie the ribbon through the holes.
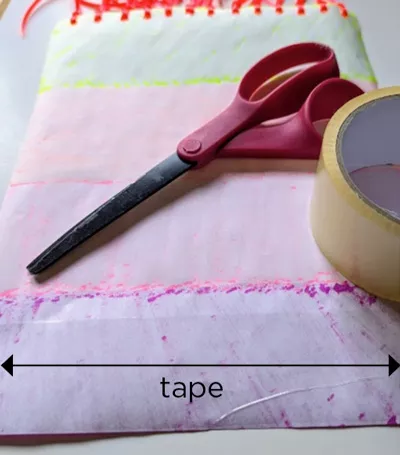
3. Add a row of tape along the top of the inside of your windsock, (the side that is not decorated).

4. Roll your windsock into a cylinder and glue or tape to secure it.
5. Punch two holes directly across from each other through the tape on the top of your windsock.
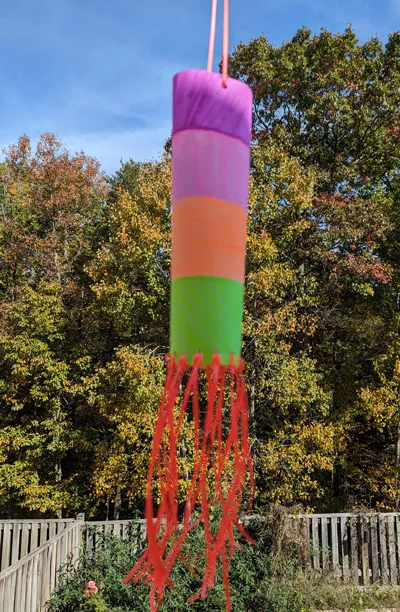
6. Thread a string through the top of your windsock to hang it.
STEM Challenge
Challenge your students to create a working windsock that shows wind direction out of lightweight fabric or plastic bag scraps.
Hint: The size of the sock may vary, but there are specific diameter-length ratios that should be followed in order for the windsock to inflate properly in the wind.
- 4’’ Diameter requires a 3/8’’ Length
- 6’’ Diameter requires a 9 1/2’’ Length
- 8’’ Diameter requires a 12 1/2’’ Length
- 10’’ Diameter requires a 15 3/4’’ Length
- 13’’ Diameter requires a 20 1/2’’ Length
- 18’’ Diameter requires a 28 1/2’’ Length
- 20’’ Diameter requires a 31 1/2’’ Length
- 24’’ Diameter requires a 37 3/4’’ Length
- 36’’ Diameter requires a 56 1/2’’ Length